Showing posts with label Pictures. Show all posts

Getting the HTML code to put a picture into your blog's sidebar, header or footer

You can use the Post Editor to get the HTML code that you need to put a picture into your sidebar (or header or footer, or anywhere else a gadget can go).


The Picture gadget is the normal tool for adding a picture to your blog's sidebar.

But sometimes you want more control over the picture size or behaviour.  Eg, you may want to have two pictures very close to each other and guarantee that they're the same size.

To do this, you need to get the HTML code for the picture, and then put it into your blog as an HTML-gadget.  Fortunately, Blogger's Post-editor make it very easy to do this without writing the code yourself.


Using the Post Editor to generate the HTML for a picture

1  Start a new Post  (NB   you're not ever going to publish this:  it's just a work-area)

2  Don't enter any text:   just use the Picture icon on the toolbar to add a picture.   Blogger will prompt you to upload the picture, or to choose it from a Google-album-archive or to enter its URL:  add the picture the way that you usually would.

3  Switch to the HTML tab   (top left of the editing window).

This show you the HTML code for displaying the picture, as it is set to display in the Post (depending on the picture-settings you've chosen, it may be centered or right/left aligned, and the size may vary).

Copy the HTML.

5  Switch back to Compose, so that you don't get confused the next time you edit a post.

Return to the list of posts:  you may be asked if you want to leave the page without saving - the answer is Yes.  Or you may have a new draft-status post, which you can delete.


Job Done!   You now have some HTML code in your memory which you can paste into an HTML/Javascript gadget, or anywhere else that you may need it - even into another post that you are editing in a separate window, or into a totally different tool.


Related Articles

Stopping pictures on your blog from being "clickable"

Inserting a Picture into a blog Post.

Putting 3rd party HTML into your blog

Center-align the gadgets on your blog

Hosting pictures outside of Google / Picasa

Inserting a picture into your blog as a gadget

How to put pictures into unusual shapes, using PowerPoint

This article explains how to put a picture that is one shape (a "square peg") inside an image of another shape (a "round hole" - or star, elipse, octagon, etc) - using Microsoft PowerPoint.

Original title:   How to put a square peg into a round hole - in pictures


Wooden clothes peg in a customized rectangle with rounded corners.
Recently, I've been using PowerPoint to make the thumbnail image for my posts. This means that I own the copyright of the pictures, so can share them without worrying about copyright issues.

One approach I've used is to find an interesting copyright-free picture that is related to the theme of the post, and then put it inside a shape that adds some visual interest or has some words along side it.  Another thing that I'm going to try is using multiple pictures in this way to make a more-interesting-than-usual collage.


How to put a picture inside a shape

NB PowerPoint commands are based on Office 2007 and 2010 - but the same principles most-likely apply in other versions where the commands may be slightly different.


1   Get your image file, and save it somewhere on your computer.

A wide range of picture-file formats are supported by PowerPoint:  in the 2007 version this includes as shown in this list:

2     In PowerPoint, make a blank side (Home > Layout > Blank)

3     Then add a shape (Insert > Shapes, click on the shape you want)


Intially, the shape with have the fill-colour and border that are the current default values. But you can change this, which is what we are going to do.


4    Right-click on the shape, and choose Format Shape from the pop-up menu


5    In the Fill tab, choose Picture or Texture Fill, then click the File button and navigate to the image file you got in step 1, and click OK.


6   Make sure that the portion of the picture that you want to show is in the picture:  to start with the shape is centered on the middle of the picture.

Change this using the Offsets to move the shape to the left or right over the image.   You can make the offsets positive or negative as shown.

You can monitor the results of different settings in PowerPoints slide thumbnails (on the left hand side, if you have it showing), or by dragging the pop-up menu to a different place in the screen so that you can see the shape itself.


Job Done - at this point, you have an image that is cropped to the shape that you chose - now you just have to put it into your blog.


Using the picture


There are (at least) three ways to get the shape-cropped-picture from PowerPoint into your blog.

I usually copy the item from PowerPoint, and then paste it into a picture editor (Paintbrush etc), manually.   This is an old-fashioned approacb - but it lets me adjust the size and position of the image, and save it (usually a .png) with a file-name that describes the image really well which is good for mating the blog come up in search results (SEO).   The this picture can be inserted into a post just like any other picture.

Another option is to choose File > Save As from Powerpoint, and choose to save the slides in an image format, eg JPEG which can also be inserted into a post in the usual way.  You are likely to be asked whether to put all the slides in one image, or to make one image per slide. Usually, it would be best to make one image per slide - but I don't use this method because the image that is created is the size of the whole slide, rather than just the pictures on it.

A third option is to display the PowerPoint file as a slideshow. This isn't something that I'd do for only one shaped image, but may be relevant in some situations.


Adjusting the size and quality of the picture


One thing that you don't have any control of inside PowerPoint is the zoom level of the inserted picture.

If you make the shape larger, it doesn't show a larger proportion of the picture. Instead, it just shows the existing picture in a larger size, as you can see in the slides shown here.

I suspect that if you want to zoom in to a particular area of the image file, the only approach is to edit the picture in another tool, crop out the bit that you do not want to show, and only keep the part that you want to include inside your shape.

However PowerPoint does have some limited control over the contrast and brightness of the picture, from the Picture tab of the Format Shape window.


Can you do this in other tools?  Why PowerPoint?


Yes, you can.

Photoshop, and similar commercial tools almost certainly have features like this, and I'm certain that GIMP (like a public-domain, less powerful version of Photoshop) and Inkscape (another public-domain image program which is more focussed on scalable-vector-graphics and objects than on pixels) also have these features.

So why use PowerPoint?   In short, its (relatively) cheap and many people have access to it already.   It's also very easy to learn, compared to the other packages, and what you learn is likely to apply to lots of tasks and not just in making pictures for your blog.


Related Articles:


Putting a picture into a blog-post

Post.thumbnail and post.summary - ways of describing blog posts

Showing a PowerPoint slideshow in Blogger

Copyright, blogs and Blogger/Google

How to find the URL for a picture in Google Photos

This article describes how to get the URL or internet address of a picture in Google Photos, and the difference between Google's shareable links and URLs.


Google Photos is a tool that help bloggers (and everyone else) to manage their picture collections. It replaces Google+ Photos, and works alongside Picasa-web-albums.   You can read more about it here.

In Google Photos, there are two different types of web-address for a photo.
  • One is the URL, and this can be used to refer to pictures from Blogger, or from other tools that want a link that just shows the photo, eg Twitter, Google Maps.  This is the traditional style of internet-address for a photo.
  • The other is the shareable link.   This is what Google Photos provides from the Share function.   Shareable links can be used in Facebook, and other places where the photo that is being shared is displayed within a web-display, rather than just as a picture.   (Ref:  How to make and manage shareable links in Google Photos.)

Unfortunately shareable links cannot be used in many applications.  This is because they don't just show the picture.   Instead they load a display showing the picture-date, the name and picture of the person who is logged in to Google at the time, and any other pictures that you have included in the same shareable link.

If you want to use an image from Google Photos in a tool which cannot use shareable links, you need to find it's URL, instead.   At the moment, Google Photos doesn't have a way to get this - but luckily it's easy enough to find.


How to get the URL or web-address of a photo in Google Photos, using your computer

Log in to Google Photos

Navigate to the picture that you want to get the link for.  

Click on the picture, so you see it in full screen mode.


Right click on the body of the photo and choose the "copy link" command from the menu that pops up where you clicked.  

The exact wording of this command varies between browsers on operating system.   For example in Chrome / Windows 8, it is simply "Copy Image URL"


In Internet Explorer 11 / Windows 8, you need to choose Properties from the pop-up menu, and then copy the value from the URL-field in the window that opens


Job done! The URL for the photo which you were looking at is now in your computer's memory, and you can paste it (with ctrl/v or Edit > Paste) into any other place that wants it - for example Blogger's photo-insert wizard, or an email message or discussion forum or chat window.


The URL from your address bar doesn't work

You may be tempted to just copy and paste the URL from the address-bar in your browser. And this will work for you.

But if someone else (or you, when you are not logged in to the same Google account) tries to use it, they will get either:
  • A 404 error (if you are logged in to a different Google account), or
  • Invited to log in to your Google account - followed by a 404 error if the Google account you log in to is not the one that owns the picture.


How to get the URL or web-address of a photo in Google Photos, using your phone (Android or iOS)

Unfortunately I have not managed to find a way to get photogrpah URL (rather than the shareable link) from my smartphone as yet.

If you can suggest any ways to do this, please leave a comment below.


Where to find more information

Introducing Google Photos:  how does it compare to Google Plus Photos and Picasa-web-albums

How to change the date of a picture in Google Photos

How to get the shareable link for one or more pictures in Google Photos

Putting pictures and text side-by-side in blog-posts

How to share pictures from Google Photos, using shareable-links

This article describes how to get a link to one ore more photos from your Google Photos collection, using the Shareable Link controls.   It also explains how to delete shareable links that you have made in the past


Google Photos is a tool for managing picture collections. It replaces Google+ Photos, and works alongside Picasa-web-albums.   You can read more about it here.

Shareable Links are a new type of linking introduced in Google Photos, which let you easily share one or more pictures at the same time.   You can email them, or use them in tools like Facebook.

When someone opens a shareable link, they see a display with the date, the name and picture of the person who is logged in to Google at the time, and all the pictures that are included in the same shareable link.

If you want to use an image from Google Photos in a tool which cannot use shareable links, you need to find the URL for the photo, instead.


How to get the shareable link for one photo in Google Photos


Log in to Google Photos

Navigate to the picture that you want to get the link for.  

Click on the picture, so you see it in full screen mode.

Hover your mouse towards the top-right of the screen, and you will see some control show up: these are quite small, and are white (so may be harder to see against some backgrounds).

One of the controls is the Share icon:  it looks like a side-ways triangle with one bar missing.     Click it.


In the Share pop-up that opens, click "Get shareable link"


Wait while Photos generates a link.

When it is finished, copy the link text.  
(Ctrl/c on the keyboard is the easiest way to do this, since the text is automatically selected).


Job done! The display address for the photo which you were looking at is in your computer's memory, and you can paste it (with ctrl/v or Edit > Paste) into any other place that wants it (eg Facebook, in an email message, or something that will accept an address which displays the photo inside a "wrapper" of some sort.  s photo-insert wizard, or an email message or discussion forum or chat window).


How to get the shareable link for more than one picture


You can share several (or lots) of photos with someone by just giving them one web-address, which opens up a screen with all the photos.

 To do this:

Click the small selection icon (tick) at the top left hand side of each picture that you want to include.
(Once a photo is selected, the icon shows as blue, and there is a border around the picture).


Hover your mouse towards the top-right of the screen, and you will see some control show up: these are quite small, and are white (so may be harder to see against some backgrounds).


Click the Share control icon:  it is the one that the arrow is pointing to in the picture just above this.

Continue in the same way as for getting a shareable link to an individual photo (ie the section above)


What does the Delete link do

You may have noticed that there is a delete function on the Shareable link screen.


If you click it, then you are given the chance to delete any existing links to the currently selected group of photos.


This doesn't seem to make any sense at the time when you are first making the link.

But it also works later on:  if you have the same photos selected and choose to get the shareable link again, you will get the same link - and you may delete it instead.

This does not delete the photos themselves, just the previous link to the currently-selected group of photos.   If anyone (or anything, eg Facebook) tries to use that link again, they will get an error message instead.

Another way to delete links is from the left-side menu in Photos:  Choosing  More > Shared links shows you al list of all shareable links you have ever made, and then for each one you can either copy the link or delete it.


Where to find more information

Introduction to Google Photos

How to put a picture into a post in Blogger

How to change the date of a photograph in Google Photos

This article shows how to change the date associated with a picture in Google Photos.


Update- August 2015

There is now a feature to change the date of individual pictures or videos in Google Photos.

To use it:

  • Navigate to the picture / video you want to set a new date for
  • Click the "information" icon (small "i" currently near the top-right of the photo viewer screen)
  • In the right hand panel, hover your mouse over the item in Details which has a picture of a calendar beside it.
  • Click on the pen icon which appears while you are hovering
  • Enter the new year, month, date and/or time (in 24-hour clock) for your photo or video.
  • Click Save.
Job Done!   You have now changed the date stored with your image or video.


There are still some photos that you cannot see through Google Photos (eg ones uploaded directly through Blogger with some settings, or shared in Google Hangouts).   For these you need to use the date-editing features in Picasa-web-albums, which are described below.


Original Article

When you open Google Photos by default you see the All Photos tab, which shows every picture in your Google account, sorted by the date on which the picture was taken, with the newest at the top.

This works well for recent photos that were taken with smartphones, and so most likely have the correct date-time attached to them.

But for older photos, that were added to Google in bulk when you finally uploaded them from your camera's memory card, the attached date may not be right.

It's even possible to have some photos with no date attached to them - and it looks like Google Photos, very confusingly, shows a nominal date figure in 2075 for these.

One way to avoid the confusion caused by these wrong dates is just to use the Collections tab to view your pictures, and to put photos with the wrong dates into appropriate collections (aka albums) yourself.

But if you want to keep using the All Photos view, you may want to alter the date for some of your  individual photographs, so they show up in the right order.


How to change the date for a picture in Google Photos

Unfortunately Google Photos doesn't have a feature for doign this (yet).   But you can adjust the date assocaited with with a picture by using Picasa Web Albums - provided you have at least some aspects of a Google+ profile (eg a Google+ Page) associated with your Google account.

Follow these steps:

Go to Picasa Web Albums, using the no-re-direct link: https://picasaweb.google.com/lh/myphotos?noredirect=1

Find the album that the photo(s) you want to change are in

Click on the album - this will open the album, and display each picture in it.

Click on the photo you whose date you want to change.

From the menu bar, choose Actions > Edit on Google+.   This opens the photo in Google+'s photo viewer mode.


Click on the drop-down beside Photo Details in the right hand information bar.


Use the options in the pop-up window to choose the correct date, time and even time-zone.


Click Save


Job Done! If you now look at the picture in Google Photos, you will see if with your newly changed date associated with it.


What if you don't have Google+

If Edit in Google+ is greyed out and cannot be selected, then this means you do not have Google+ associated with your Google account.

 The only work-around for this currently is to share the photo (from Google Photos) with another Google account that does have Google+, and use that to change the date.


Where to get more information


Introducing Google Photos - another tool for managing your photo collection.

Understanding Picasa desktop vs Picasa-web-albums

All about Google accounts

Blogger and Google Photos - what's changed, and what hasn't (yet)

This article gives a brief introduction to Google Photos, and how it relates to both Blogger and Google+ Photos.


Google's recent announcement of Google Photos opens the door for Blogger to make some improvements to how it works with pictures.

Why? Well Google+Photos simply wasn't a way forward.   Too many Blogger users chose not to "upgrade" their Google accounts to Google+ accounts, so it wasn't possible for Blogger to force Google+ features on everyone. And that was even after they removed the rule about one G+ account per person, and allowed Google+ Pages to be turned into stand alone accounts with their own passwords.

However Google Photos is basically Google+ Photos, without the need to have a "plus" account, and with some other nice features, like

  • Free picture and video storage (any number of pictures, provided they aren't "too big"), 
  • Image recognition and search
  • Sorting pictures by date, but giving options for you to group them into albums

Read more about these Google Photos options here.  

This means it will be possible for Google to replace Picasa-web-albums features with Google Photos features at some time in the future, even if they're not ready to do this yet.


What's changed - and what hasn't (yet)?

So far, I haven't noticed any changes to the photo-upload or image-choice features in Blogger.

There's still an upload option, there's still a tab to choose photos from Picasa and one for your phone - and I don't know what the criteria for showing photos in the latter tab is, but it's certainly not listing all the photos I've taken from my phone.


I am expecting they will change to become more Google-Photos-esque, sooner or later.

But for now, though, not that much has changed.

Your Google account still only has one collection of pictures.

Your pictures may be photographs you have taken or other image files that you have created and uploaded (eg like the thumbnail picture that I constructed for this post).

As well as the various mobile phone applications (official ones for iOS and Android, unofficial ones from various other companies), there is now one more (to make six) pieces of desktop software or websites from Google that you can use to manage (aspects of) your picture collection:

Note:   Even though you only have one photo collection, each tool may need to build it's own "index" (or whatever it calls it) to work with your photos.  Making all your photos (especially the historic ones) available in each tool might take a while to do: For example, not all my photos are visible on Drive yet: when I scroll to the bottom of the display I get a message saying "Stay tuned, your older photos are coming soon" - and looking at what is displayed, it's only photos that I have posted from my current smartphone (not the old one) to one particular blog.


And the tools don't all do the same things. In particular, there are features like albums and slideshows are still best done from Picasa (more info here: http://picasageeks.com/2015/05/google-photos-announcementthis-is-big/) - and  Picasa Desktop's photo editing tools are still vastly better.


edits you can do in Picasa dessktop but not on-line
Example of a photo editing effect which is possible in Picasa Desktop, but not in Google Photos


Where to find more information


Putting pictures side-by-side in a blog post or gadget

This article shows how to put pictures side-by-side in Blogger (or any other website) using HTML, in a way that works for visitors using mobiles (smartphones and tables) as well as larger screens.


Placing pictures side by side in Blogger:  a picture of three images next to each other on the same line
Previously I've explained how to use a table to force photos (and other things) to all show into a line, even if the user's screen is too small to display them all at once.   And I've looked at putting text and pictures side-by-side - assuming you're only working with one picture.

Tables are great if you are showing data and need rigid alignment, or if you don't mind your mobile device visitors having to either scroll, or to pinch their screen so much that they cannot read the text.

But there is a way to lay out pictures so that they display side by side if there's room on the screen, or start on a new line if there's not.

I've done this recently on a blog where really wanted to make a display for last / next week and last / next year on two different dimensions. It looks like this on a smartphone vs a tablet.   Notice that on the tablet, the two middle pictures are on the same line.


How to lay out several pictures side-by-side if there's space, or one-under-another if not

Start to prepare your post in the usual way.

Add your pictures to the post in the usual way. Ideally, put them just before or just after some marker text that you can use to help you to find the code for it in the next step.

Hover over each picture, and choose the small size (you can change this later)

Go into HTML mode.

Find the place where the pictures are.   (If you've used marker-text, just use your browser's search feature to go to it.)

Add this code, just where you want the line of images (or other items) to end up.
<div style="display: inline-block; margin-bottom: 2em; margin-right: 2em; width: NN;">
IMAGE CODE FOR PICTURE</div>
<div style="display: inline-block; margin-bottom: 2em; margin-right: 2em; width: NN;">
IMAGE CODE FOR PICTURE</div>
<div style="display: inline-block; margin-bottom: 2em; margin-right: 0em; width: NN;">
IMAGE CODE FOR PICTURE</div>

That has space for three pictures - you can delete one or add more lines if you want to - just make sure that the very last one has margin-right: 0em; and the others all have margin-right: 2em;

Now, for each picture that you added,
  • Find the HTML code for it.   (This post has a detailed explanation of what the HTML code for a picture)
  • Delete the height = "nn"  part from it   (nnn = whatever number is there)
  • In the width = "nnn" part, replace nnn with  "100%", so it says   width = "100%"
    Note:  this is saying to make the picture take up the whole width of the division you have assigned it to.   You can make it smaller than 100%.   But you want to do it put a bigger margin between the two pictures, then you can do this by increasing the value in   margin-right: 2em;      
  • Move the picture code to where it says IMAGE CODE FOR PICTURE
  • Decide how wide the picture should be, and change the value in Width: NN within that DIV statement to the right amount.
    You can either use pixels (eg width: 100px;), ems (eg width: 20em;) or percentages (width: 40%;)   If you use percentages, then the total amount for all the pictures should be a little less than 100%, so allow for some space between the pictures:  for example, with a 2em margin and three pictures in a row, you may need to make the total approx 90%.

Go back into Compose mode, and check that your pictures look roughly right - if necessary, you may need to adjust the picture sizes.   (See the note below under Troubleshooting for more about this.)
Delete the marker text.


Job done!   Your pictures will now display side-by-side if they can all fit into the user's screen, or one under another if not.


Troubleshooting

Getting the pictures right can be quite fiddly, so I recommend preparing the blog post in private, so you can do this in stages, and save your work regularly as you go.

Your pictures will be vertically aligned on the bottom axis, and this means that the approach will work best with pictures that are the same height.    (I'm working on another article looking at alignment issues - it's they're quite tricky.)

Post editor view vs your visitor's screen

An issue that many new bloggers struggle with is that what they can see in the post editor is not the same as what their blog-visitors will see.

The post editor screen is only a certain width.    Most times, it is smaller than the width of the main body of your blog.  So, if you have used fixed-widths (ie in pixels, or ems, not percentages), more pictures fit on the same line in your blog than in the post editor. But if a visitor is using their smartphone to read your blog (and I do a lot of my blog-reading on the phone these days) - the screen width is less than it is in the post editor.

This is why using <div> statements instead of <table>'s is a good idea.  But it does means that sometimes you will have to compromise on whether things can be put together.

Is this only for pictures?

No - you can use this technique with blocks of text, videos - in fact anything that you can put into your blog.

What about gadgets?

You can use this technique anywhere that you can edit the HTML.  So, you can put pictures in a row in your sidebar, header or footer by using a HTML-gadget.    (This post shows a handy way to get the picture code when you're making gadgets.)

Captions

don't recommend using captions with this this technique.   Blogger shows them using tables:  they put the photo and text into a one-column-two-row table, and this makes working with the picture code a lot more difficult.   If you really want to use them, then add them after you have moved your picture code inside the <div>...</div> statements.


Related Articles:


Using a table to display data in your blog

Marker text helps you to find places in your blog post

Putting text and photographs side-by-side 

How to add a picture to a blog post

How to get the HTML code for a picture when you don't have an insert-picture icon on the toolbar

Introducing the "Free high-quality picture search" tool

This article introduces the Free High Quality Picture Search tool which has been added to this website.

Today I've added a new feature to Are-You-Blogger.

The Free High Quality Image Search tool is available from the menu bar. It is a tool to help you locate free, high-quality pictures to use in your blog posts or other website projects.

It is based on a Google-custom-search engine, and a carefully selected set of websites that offer images you can use for free on your blog, even if it is "commercial" (ie you have advertising or any other way of making money from it).

The difference between this and the images that you can get from a general-purpose search using the Creative Commons image and multi-media search tool is the resolution of the images that are found and/or their photographic quality.

How to use the Free-image-search tool

  • Type a description of the image you want to see into the search-bar.
  • Press Enter
  • When the results display, click the Image tab, to see what photos are available.
    (Hopefully this step is only temporary, and I can soon manage to have the search-results default to images and still use the tool in Blogger.)
  • Use the numbers in the lower-left side to move to different pages in the image-search results.
  • Choose an image that you would like to use.

Once you have chosen an image, you can either link directly to if (if the site allows), or download a copy, put it on your own image-service (eg Picasa-web-albums), and use it in your blog.   The latter approach is required if you want the image to be used as the thumbnail for your post.


Copyright

By definition, all images returned by the search-tool should be free-use and so not subject to any copyright rules.

However some do have attribution requirements, and you may need to use image-captions or similar to make sure that these are followed in your blog.


Related Articles:

Finding free photos for your blog, using Creative Commons

Introducing Google-custom-search engines

Summarise your blog-post with post.snippet and post.thumbnail

Copyright, Blogs and Blogging, an introduction

How to take better pictures - no matter what sort of camera you have

This weekly blogger tip is complements of Shutterfly:   tips about how to take great photos, of various types, no matter what sort of camera you use.

Why?


Why take your own pictures, when there are so many free-photo-search tools out there?

Well, if you want your blog to be copyright-legal, then you need to either find free-use photos, or make your own. Creating your own post-photos is especially useful to prove that your local blog really is local (like this) - and taking pictures that I take myself and host pictures in Picasa / Google+ Photos means that my posts always have a thumbnail image.


How?

Great tips from the pros, here: http://www.shutterfly.com/how-to-take-the-perfect-photo/

The best bit is that this isn't just a glossy, or a snobby "fancy-cameras-only" guide.    There are tips for every combination of  camera type:
  • DSLR
  • Smartphone
  • Point and shoot
and photo type:
  • Portraits
  • Selfie
  • Bokeh
  • Macro
  • Action shots
  • Close up
  • Wide angle
  • Food
  • Candid
  • By the water
  • Landscape
  • Panorama


PS Shutterfly said
"Please share this interactive on your site or blog. Just copy and paste the code below"

So I did. But it looks like it's not working 100%. To get into their tool, click here: http://www.shutterfly.com/how-to-take-the-perfect-photo/


Happy snapping!

Use diagrams to make pictures for your blog posts

This post from the Weekly Blogging Tips series is about a cost-effective way to make pictures for blog postings.


The best blogging advice is that every post should have at least one picture:  is a stunning professional-looking shot which perfectly illustrates the point you are making perfectly.

This is a great idea if you're a professional photographer and have all time in the world, or if you can afford to purchase images which are custom made for your blog.

But most of us just aren't in that league.

Sometimes, you can use a search tool to find a re-usable photograph that you can put into your posts. (Remember to download your own copy and put it into a Google picture host, to make sure that it's accepted as the thumbnail picture for the post.)

But another option is to use a diagram - like this.


The picture above is a diagram that I used in a blog-post to emphasise that budgeting for an event is on-going through the planning phase, not a one-time job   I spent quite a while thinking about how to make the point about the original plan vs the on-going feedback loop.

Diagrams don't have to be complicated. Sometimes something as simple as showing a bullet pointed list in a different shape can be an effective way to add "visual texture" to your post and thus make it more appealing for people to read.


There are various tools that you can use to make diagrams.
  • PowerPoint is fantastic especially in in Office 2010 and 20123 where it has shape placement guidelines, as well as the usual squiggly word-art, smart-shapes, gradient-fills etc. 
  • Google Spreadsheets is catching up, though they've got a way to go yet, and your have to use screenshot tools to get an image (JPG, PNG or BMP) file from it. 
  • And most other drawing and word-processing tools include some drawing tools too.

Stop Google from "fixing" pictures that are loaded through Blogger

This article is about how you can stop Google from automatically "enhancing" pictures that are loaded in Blogger - even if you do not have a Google+ account.


Google has started automatically "fixing" new pictures as they are added to your blog

In May 2013 Google added the Auto-Enhance and Auto-Awesome features to Google+ Photos. These are meant to make your pictures look better, ie more like those which are taken by professional photographers.

These features are turned "on" by default. And because:
  • Photos loaded using Blogger are stored in Picasa-web-albums, and
  • Picasa-web-albums and as Google+ Photos actually have the same collection of photos - yes, even for accounts that do not use G+,
the effect is that auto-enhance and auto-awesome are applied to all images loaded through Blogger's post-editor, header-picture loading tool and gadget-picture loading too;.


Why is this a problem

In many cases, these features work as they are intended to, and the illustration that is shown on your blog is more attractive than the one you uploaded - it's brighter, clearer and loads faster.

But there are some situations where the effect of the auto-enhancement is not good. These include:
  • Pictures with some transparency - which is auto-corrected to either light grey or black
  • Pictures that are intended to be dull / dark / shady - these are automatically lightened.]
  • Pictures that are loaded at a certain photo quality - are automatically downgraded to a lower quality (which is fine for viewing on screen, but not so fine if you actually want to use your blog to share high-quality photos).

Blogger users who have a non-white background, and who deliberately upload images with a transparent background so their blog background will "show through" the image have been particularly annoyed by this.   And I have been less than impressed by the faint grey "wash" added to the background of some of my diagrams - for example:

The left-hand picture was auto-enhanced, the right hand one was not


How to turn off photo auto-enhance if you use Google+

If your blog - and the account you use to post to the blog - is linked to your Google+ profile, then you can stop your photos from being changed by:
  • Opening the Google Plus settings tab.
  • In the "Photos" section, un-ticking "Automatically enhance new photos"

This stops the auto-enhance and auto-awesome tools being applied to any new photos that you upload from now onwards using Google+ Photos, Picasa-web-albums or any Blogger feature that lets you load a picture (the post-editor, the header widget settings, the picture gadget settings).

Alternatively, you can turn off the auto-enhance and auto-awesome changes that are made to specific pictures by by finding them in Google+ photos and un-ticking "Auto-enhance" in the "More" menu.


How to turn off photo auto-enhance if you do not use Google+

There is currently no option in Piscasa-web-albums to turn off the auto-enhance feature.
This means that if you load photos to either Blogger or Picasa-web-albums, using a Google / Blogger account that is not linked to a Google+ profile, you cannot stop auto-enhance from happening.

Some people have suggested that the way around this is to:
  • Temporarily link the blog to a Google+ profile (either your own one, or one that you create just for the purpose - eg "Mr John Smith")
  • Turn off the auto-enhance feature using the Google+ procedure listed above
  • Fix up the damage to any pictures that you loaded through Blogger or Picasa-web-albums between mid May 2013 and today by finding them in Google+ photos and un-ticking "Auto-enhance" in the "More" menu.
  • Unlink the blog from the Google+ profile.

However I do not believe that this is entirely correct:   my tests suggest that whether or not photos are auto-enhanced is controlled by the settings on the Google+ account that is used to upload the pictures, no matter whether the blog is attached to a Google+ profile or not.

(I've been testing this a lot because I have a number of blogs that are linked to Google+ Pages that are in my personal profile, but which I generally post to using a different Google account that has a more generic name like "Editor, Table Quiz Helper", and it's own separate set of Picasa-web-albums:   I want to be able to hand these accounts on to my successor when I leave the community groups that they are for.)

Previously, the main options that I identified and recommend were:

However another option, which I now think is better, is to:

  • Make a Google+ Page for the blog
  • Give that Page it's own login-name and password - effectively turning it into a separate new Google account
  • Give that new Google account administrator rights to the blog
  • Make the setting change described above in "How to turn off photo auto-enhance if you use Google+" while you are logged in as the new Google account
  • Use the new Google account to load photos to the blog:   this will mean that the photos are placed in the Google+ Photos album associated with the page, and so you can access them using either Picasa-web-albums or Google+ Photos.


Other Options

If you really don't want to use even a minimal Google-plus account, then your options are limited.

Use another picture host

You could load the pictures that you want to use in your blog to another picture-hosting service (eg Flickr) - however doing this means that you posts will not have a thumbnail image.

Minimise the damage

If you make sure that pictures which you load have a white background (or whatever colour background your blog has) instead of being transparent, then the impact of auto-enhance will be a lot less.    I have found that if you use a .png file rather than a .jpg, the background is white instead of transparent.   (This is fine for me, because I use white blog backgrounds.)

Wait for things to change

A very simple fix would be for Picasa-web-albums to use default values of "No" instead of "Yes" for auto-enhance and auto-awesome, or to set these up as settings in the PWA profile.

Another option is that Google may improve the enhancement algorithms (ie rules which control how pictures are "touched up").

Fingers crossed, one of these will happen soon.


Related Articles:

Giving another Google account Administrator rights to your blog

Turning a Google+ Page into a separate Google account

Post.snippet and post.thumbnail - how they are derived from your blog post

How to add a picture to your blog, using the picture gadget

Making a Google+ profile for the Google account that you use to upload the pictures,

How to edit a picture in Picasa Web Albums or Google+ Photos

This article is about how to edit pictures in Picasa web albums, and how to use Picasa-destop to edit pictures in your Google+ Photos.


Picasa-web-albums vs Google+ Photos

Picasa-web-albums is a on-line photo storage and management tool, now owned by Google.   It is the on-line version of Picasa, a desktop-tool.   (Learn more about PWA and Picasa here.).

Google would ideally  like everyone to use Google+ Photos.

But there are many people who store pictures in albums that are not associated with their personal Google+ accounts:  these may be for businesses, schools, clubs, etc.

So it is likely PWA will continue to exist for a good while yet.   And I am sure that Google appreciate this:  they have made a number of changes to Picasa-web-albums to make it work better both with Google+ and without it.


Options for editing pictures that are are uploaded to Google

  • If you have a Google+ account, then there are two ways of editing photos that you have loaded to Google (it doesn't matter whether you loaded them using Picasa-web or Google+Photos).  

    Both of these options are described below.   Using the Google+ editor (option 1) doesn't need any software installed on your PC.   But it's very slow to load, offers you less control, and is currently missing some key features - and it only works if you are using Chrome as your web-browser, not Firefox or Internet Explorer.
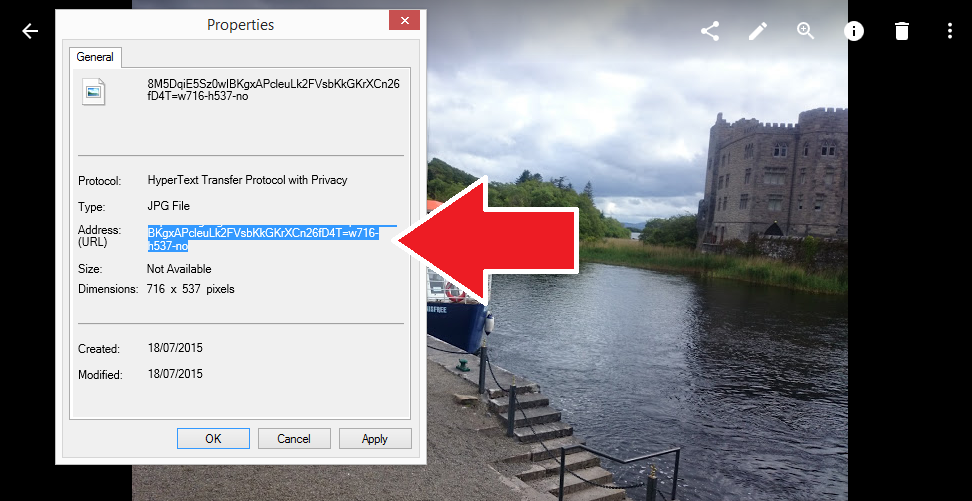
  • If you don't have a Google+ account, then Google / Blogger only provides only one way to edit photos that you have loaded to it (apart from downloading the photo, editing it on your PC and re-uploading it - which changes the URL you need to use to link to the photo).   This is Option 2 below.

Option 1: Using Google + edit a picture in Picasa-web-albums

Log in to Picasa-web-albums, using your Google+ account.  
(See here for what do to if you are automatically re-directed from PWA to Google + Photos)


Navigate to the photo that you want to edit.  
(Make sure you're looking just at that photo, not at the album it is in - this can be confusing in cases when the photo is also the album cover.)

Choose Edit in Google+ from the Actions drop-down menu.

This opens a new window or tab.

If you are not signed in with your Google + account, you will be invited to join.

If necessary, sign-up for Google+, or sign in with the correct account, and start again.

Now, you will be looking at the photo in the Google+ Photos picture view.   From here you can do simple edits:
  • Crop the photo
  • Tag people
  • Rotate the photo
as well as using the other Google+ Photos features (share, slideshow, delete, zoom)

To do more changes, choose Edit (yes, you need to choose it a 2nd time) from the top menu.

If you are not using Google Chrome, then you will get a message saying that the Google+ photo editor only works with Chrome, and giving you a link to download it.    If necessary, switch to Chrome and start again.

Wait while the photo editing tools are loaded  (this does take a while, perhaps even a minute or two).

Once loading is finished, the current Google + Photo editor functions are available from the right-hand bar, like this:


At the moment these are:
  • Tune (brightness, contrast, saturation, shadows, warmth)
  • Selective Adjustment (lets you specific areas for other options to be applied to)
  • Details (sharpness and structure)
  • Crop and Rotate
  • Black and white
  • Centre focus (adjust brightness and blur around the centre)
  • Drama
  • Frames
  • Tilt-shift
  • Vintage
  • Retrolux.

When you  are happy with your photo, click the Finished Editing tick box at the bottom of the right-hand bar, and the changes will be saved (this may take a few moments).

You are left in the open Google+ Photos tab or window, not returned to Picasa-web-albums.   When you go back to Picasa-web-albums and refresh the page (F5), the changes that you made in Google+ photos will be shown.


Option 2:   How to use Picasa-desktop edit a picture in Picasa-web-albums

This option only works if you have Picasa desktop software installed on your computer.

Log in to Picasa-web-albums, using your Google account.

Navigate to the photo that you want to edit.   (Make sure you're looking just at that photo, not at the album it is in - this can be confusing in cases when the photo is also the album cover.)

Choose Edit in Picasa from the Actions drop-down menu.

A pop-up window will tell you that your web browser wants to open another program (ie Picasa-desktop) to do the editing.

(The exact text is something like:   "External Protocol Request:  [your web browser] needs to launch an external application to handle picasa: links.   The link requested is ... The following application will be launched if you accept this request   c:\Program Files\Google\Picasa\Picasa3.exe ... If you did not initiate this request, it may represent an attempted attack on your system.   Unless you took an explicit action to initiate this request, you should press Do Nothing.")

Choose Launch Application.

Picasa will load on your computer, and you will be asked to confirm that you do want to edit the selected picture.   Choose Edit Image.

A copy of the picture that you want to edit is opened in the desktop-Picasa editing tools window.

From here you have access to all Picasa's standard photo editing tools (including the text tool for adding watermarks).

The photo you are working in is a copy taken from your Picasa-web-albums, it is not the same as the copy of the picture which may already be on your computer.   It is stored in a directory of your Picasa-installation called "Online Edits", not in your main My Pictures directory.   So if you choose a function like "Back to Library" you are taken to the Online Edits folder inside Picasa-desktop.

From here you can use all of Picasa-desktop's editing features, including straightening, red-eye reduction, text-editing, re-setting the neutral colour.    The only exception is the Edit in Creative Kit option:  this is still one of the options in Picasa-desktop, but if you use it, it takes a long time to load and then eventually says "Error connecting to Creative Kit... error 500" - and explains that Creative Kit has now been discontinued.

When you are finished editing, to put the edited photo back into the same Picasa-web-album that it came from, with the same file name and URL:
  • Make sure that you are logged in from Picasa-desktop to the same Google account that you were using initially.  
    (Picasa-desktop remembers your sign-in details from the last time you used it - if it's different from what you need, just choose sign-out from the top-right corner, and then sign in to the correct account when asked.)    
  • EITHER:
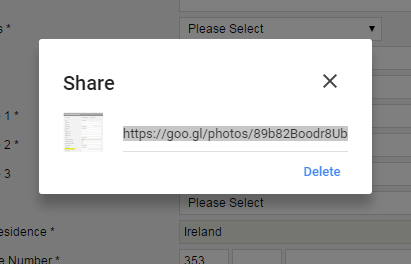
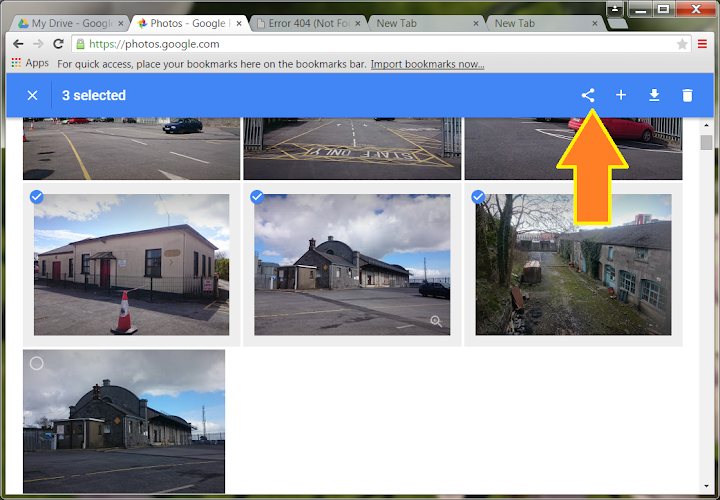
  • Choose Share on Google+    (if you are using a Google + account)
  • In the sharing-details window that opens, change the Album-name from Online Edits to  the album that the photo came from originally and choose Upload

    OR
  • Return to the Online Edits folder / library
  • Save the changes using the Save icon
  • Choose Enable Synch from the Sharing drop down.
  • Wait for the changed photo to upload.

    (I think Google have some work to do here - you can only control synching for the whole album, not for individual photos.   I expect this to be improved in the future.)


Job Done:  your Picasa-desktop-edited photo appears back in your online Picasa-web-albums with the changes that you just made, and any existing links to it (eg from your blog posts) will show the changed version of the picture.   And you can put the edited picture into your blog posts or other websites in the usual way.


Related Articles

Introducing Picasa and Picasa-web-albums:   an overview

Stop automatic redirection to Google+ Photos

How to put a picture into a blog-post

Tools for applying copyright protection to your blog

What is Creative-Kit, and how to use it

This article describes Creative Kit, which was a photo-editing tool for enhancing pictures in your Picasa-web and Google+ albums.


A little history: Picasa, Picnik and Creative Kit

In 2002, a company called Lifescape created a program called Picasa, which people could use to manage photos on their PC.

Google purchased this in 2004 and then integrated it with web-storage, linked to a person's Google account, to make Picasa-web-albums: see Understanding Picasa and Picasa-web-albums for more information about how they work together with Blogger.

Picasa has some photo-editing functions (cropping, red-eye removal, sharpening, lightening, making collages, etc).  Useful, far easier to use than Photoshop - but without features that some people wanted. So in 2010, Google integrated a photo-editing tool from Picnik, a small company that was offering a subscription-based photo hosting and editing service.

Picnik's editor did some cooler things than Picasa, (applying visual effects, watermarks, etc).   The tool  had some serious fans, and a quirky culture which saw them show messages like "packing the lunch" "watching the flowers", "chasing butterflys" while Picnik was loading.  The type of messages that are funny the first few times, but quickly get tedious. And people using Picnik via Piscasa-web-albums often found that it was very slow.

In 2012:
  • Picnik announced that they were closing down their separate photo hosting service, and moving the product to Google+.
  • Google's announced that they were were closing Picnik, and using Picnik's engineers to “continue creating photo-editing magic across Google products."   (ref:  closure announcement).

Today, the original Picnik photo-hosting-and-editing service is most definitely closed.

The Picnik photo editor has been either replaced with or re-badged as "Creative Kit", and is available through Google+.  They may have intended to make it available through Picasa-web-albums too - but as I noted in previously, this feature isn't working. Possibly this is about selling additional storage space:   Picasa-web-albums are available to any Google account, while Google+ Photos is only available to named individuals.   So each person can have lots of Google / Picasa accounts (with free storage on each one), but only one account Google+ account.


How to access Creative Kit

To start creative Kit, so you can edit a photo with it:
  • Go to Google+, and log in to your Google account that has Google-Plus enabled.
  • Go to your Photos page (which may be on the left-sidebar, or under the More tab on the left sidebar if your screen is small)
  • Go into an album, and open the photo you want to edit.
  • On the menu at the top of the screen, click the Edit button.


This opens the photo inside a window with photo-editing tools. The screen just looks like another set of options within Google-Plus, but actually you are now inside Creative Kit, and you can use it to edit your photo.


When you are finished editing, choose the Save button from the top-left hand side. This give you an option to apply your changes to the current file, or to save a new copy of the file.
  • If you choose Replace then any places (eg blog-posts) that link to the existing photo will now link to the edited photo.
  • If you choose Save a new copy then your existing file is not changed and a new copy of the file will be made in the same folder as the existing one but with a slightly different name.

If you upload pictures into your blog-posts inside Blogger, then the picture files are stored in Picasa-web-albums LINK. If you have Google+ enabled for your account, then you can access these photos directly through either Picasa-web-albums or through Google+, even if you have not linked your blog and your Google+ profile. So you can use the Creative-kit method of editing these pictures, even if you didn't load them via Google+.


What features are available in Creative Kit

At one point Picnik used a "fremium" approach: Basic features were free for everyone to use for free, while people needed to sign up and pay a subscription to use the Premium ones. This has changed, though,and now features are are all free.

At the time of writing, the features include:

Basics

  • Black and White
  • Bocal B&W
  • Boost
  • Soften

Camera

  • Lomo-ish
  • Holga-ish
  • HRD-ish
  • CinemaScope
  • Orton-ish
  • 1960s

Colours

  • Tint
  • Vibrance
  • Duo-Tone
  • Heat Map 2.0
  • Cross-Process

Touchup

  • Blemish Fix
  • Shine-be-Gone
  • Airbrush
  • Sunless Tan

Google Plus Exclusives

  • Daguerreotype
  • Reala 400
  • Green Fade
  • Magenta Fade
  • Polaroid* Plus
  • Sun Aged


Troubleshooting / Where to get help

Creative Kit uses Adobe Flash Player. If Creative Kit doesn't work inside Google+, try installing a newer version of Flash Player.

If that doesn't help, try:
  • Clearing your cache
  • Clearing Flash shared objects
    These are data files are created by the Creative Kit on your computer, like cookies.  To clear them, go to Abobe's Flash Player help web site.
    The Settings Manager that you see is not just an image; it's the actual Flash Player Settings Manager. Scroll through the list of sites and select www.picnik.com and www.gstatic.com.

    Click the Delete Website button for each, and confirm the deletion.

    Open the Global Storage Settings Panel. Check both of the following boxes:
    - Allow third-party Flash content to store data on your computer.
    - Store common Flash components to reduce download times.

    Once you've cleared your local shared objects, clear your browser cache again.
  • Using a different browser, eg Chrome or Firefox.
  • Disabling ad-blocker or flash-blocking extensions

For more assistance, there is a Creative Kit help-centre in Google:
https://plus.google.com/100432630524345907101#100432630524345907101/posts


Is Creative Kit just Picnik with a new name?

Most probably: the controls and features are very similar, and the press-releases seem to tie up. There is one screen that names both while the photo-editor is loading in Google+>Pictures.

But on the other hand there's no official confirmation either, and there are some product differences. It's possible that Google's engineers were simply inspired by the former Picnik colleagues to create similar controls, and that the underlying photo-editing tool is different. Who knows.

What we do know is that many of the much-loved Picnik features are available in Creative-Kit, provided you're willing to load your photos to a Google+ account.


TL;DR

You can edit a photo in Creative Kit by uploading it to your Google+ account, then choosing the Edit button when you are viewing it.

This may be the same Picnik photo editor that was available in Picasa-web-albums until 2012. Or it may not. Either way it lets you crop, re-colour, apply lots of filters etc for free.

Don't want to put your photos into Google+? Bad luck, there's no other way to use Creative Kit / Picnik on them at the moment. Find another on-line editor instead.


Update

In mid 2013, Google Plus replaced CreateKit with a new photo editor (which only works on computers running the Chrome web-browser).    Therefore it is no longer possible to use Creative Kit. 

Picasa-web-albums still has  a link to Creative Kit.   But this does not work, and PWA now has other options for editing pictures that have been uploaded to it via Blogger or otherwise.


Related Articles

Creative-kit works with pictures accessed through Google+, but not Picasa-web-albums

Adding a picture to a blog post

Introducing Picasa vs Picasa-web-albums