The different between themes and templates in Blogger

This article explains the difference between themes and templates in Blogger, Google's blogging tool.


What is (was) a Blogger template

How a blog that is made with Blogger is shown to a visitor is controlled by four sets of information:
  • The posts which the blogger writes (ie the content)
  • A user-editable "configuration file" which records the overall formatting options which the file designer and then the blogger have chosen
  • Another configuration file, called the post-template, which records choices that the blogger has made under Layout > Blog posts (edit), but cannot be edited elsewhere.   
  • Blogger's own software, which puts the other things together with some internal rules to make "web pages".   Bloggers cannot control the rules in this at all.

Originally, the first "configuration file" was called a template.   In fact, officially it was called a design-template, to distinguish it from the post-template.   However because most people aren't aware of the post template, usually just the word "template" is used to mean design-template.


What is a theme

Other blogging tools (eg Wordpress, Tumblr) called their equivalent file a theme.    Most (or even all) of those tools provide less access to change things in the Theme file, for example if you use a Wordpress free-hosted blog, then you cannot change any of the code in your theme, you can only make formatting changes which are allowed for in the Wordpress front-end.

Many of the Wordpress themes have had a lot of  graphic design work done on them - using them gives a blog-site which looks very attractive (or otherwise suited for their purpose) on a wide range of screens.    Many large websites have been made using Wordpress, and so very many professional designers have created Wordpress themes.    Because of this, many people believe that it's easier to get an excellent-looking website from a theme than from a Blogger template.

Blogger templates have now become themes

Recently - I noticed it in March 2017 - Blogger started calling their templates "themes".  
  • They've changed the menu option on their dashboard from "Template" to "Theme".
  • They've changed the action button names in the template/theme editor to say things like "Save theme".
  • They've written various help articles which refer to themes.


What hasn't changed

  • We can still edit our templates themes extensively.
  • The Blogger tools that make the changes in our themes haven't changed:  All the items under the Themes tab on the dashboard are the same as the ones on the Templates tab.
  • The contents of our existing themes are still much the same  (I cannot guarantees they haven't made any changes, but I haven't seen any)
  • The themes that we can choose from when making a new blog, or changing the format of an existing one, are the same.
  • There are hundreds of help and how-to articles written by blogger-helpers like myself, which all refer to templates.   (I've started changing mine - but it's going to take a while!)

What else is going to change?   

This is the big question:   Is the rename a precursor to some other changes, eg restricting how much control we have over our themes? - or is it just a cosmetic change to make Blogger seem more modern?

Will there be some new themes released - ones that look better across a range of devices, maybe even some that are optimized for mobile instead of desktop use?

Will there be new theme-editing features introduced into Blogger's interface, to let us control things we cannot control now?

Conclusion / TL-DR

Only Google's Blogger product managers know exactly what the future plans for Blogger are - and they're not known for talking about the future direction  until they're just about to introduce new features.   

But until they do, my conclusion is that there is no difference between templates and themes in Blogger.  They are simply two different words for exactly the same thing.


NB:   Blogger product a announcements are usually made in the Blogger Buzz blog - and I see that template were still called templates in their most recent post in November 2016:


Related Articles

How to edit your Theme in Blogger

What types of theme / templates does Blogger have

Editing your blog's template:  advantages and disadvantages

How to turn on a mobile theme for your blog

Blogs, Blogger, bloggers, posts pages and screens - understanding Blogger-basics

How to make a real website, using Blogger

How to edit your Theme in Blogger

This article is about how to edit your theme in Blogger.

It supports many other articles on this site, which suggest specific theme changes needed to solve particular problems.    Note that until early 2017, themes were called templates.   In practise, "edit your template" and "edit your theme" mean the same thing.


In Blogger, a theme is a file which controls how your blog are displayed on the screen when someone reads it using a browser or a mobile device.   Themes used to be called templates, but were renamed "themes" in early 2017.

Previously, I've looked at whether it's a good idea to edit your Blogger theme / template or not.   Because themes are the same thing as templates, the same principles apply to editing your theme.

For many people, editing the theme is simply something which they need to do, because it's the only way to do what they want (remove the attribution, show a gadget on the homeppage only, add a Facebook like button to posts, etc).   And Blogger is often preferred because it allows users to edit aspects of their theme which other blogging tools done allow changes to.


Overview - how to edit your blog-theme

In general, the process to edit your theme is:
  • Make a back-up copy of the theme, as it is now
  • Open the theme-editor
  • Make the change
  • Check that it works, and if not, go back to the previous theme.
The following sections have more details about each of these steps.


How to make a backup copy of your current theme

I know:   It's tempting to skip this if you're only making a small change. I even skip it myself sometimes. And it's not needed if this is the first time you've ever customised your theme - because you can recover from problems by just reinstalling the standard theme.

But if you would be upset to lose any theme changes you made earlier, or if the change you are making now is not minor, then I strongly recommend making a copy before you start, just in case.  To do this
  • From the Blogger dashboard, go to the Themes tab
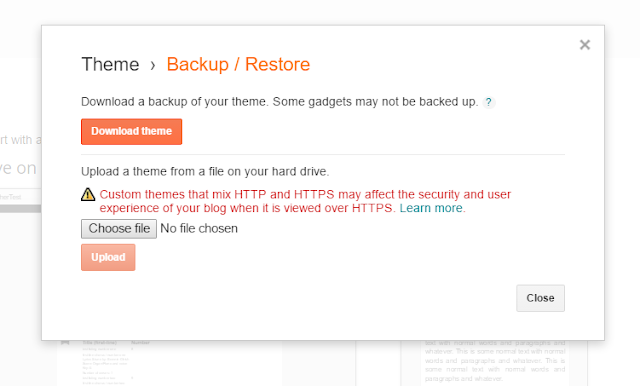
  • Click the Backup / Restore button near the top right of the dashboard
  • Click the Download Theme button, and then wait while the file downloads.
  • After the download has finished, find the place where your computer puts downloaded files.
  • Find the file that was just created,
  • Rename it to something sensible
     (eg MyBlog theme backup before change 31 Jan 2012.xml)
  • Move the file to somewhere safe: usually somewhere on your computer is fine - or you make like to upload it to somewhere like Google Docs, to be absolutely certain that it won't get lost.

How to open Blogger's theme editor

  • From the Blogger Dashboard, to to the Themes tab
  • Click Edit HTML

Now you have your theme open in the theme editor, the next challenge is making changes successfully - or backing them out if your changes were not successful.


How to make the change to your theme

  • Find the code you need to change:
    See Searching for text in Blogger's theme editor if you need help with this.

    Note:   some of the older "how to" articles say to make sure that the Expand Widgets checkbox off or on.   This checkbox has now been removed from Blogger's theme editor.    If the instructions you are following says to leave it "off", then you should just be able to follow them as is.    However if you are told to turn Expand Widgets off,  then you need to find the correct part of the code by searching for the widget-id or section name, and then "unfold" that to see the complete code.   
  • Make the change (This article doesn't go into the principles of theme design, there are plenty of other articles and websites about that: I'm assuming that you know what you need to do).
  • Click the Preview theme button
    If Blogger can make sense of the change you made, then view of your blog is shown in the theme-editing area, with what looks like your blog's homepage. It's not a real copy of your blog (the links won't work, the spacing might not be quite the same), but it shows you how the home-page will look with your theme edits.
  • Do a quick check that the screen looks right - for some changes you even be able to tell if the change has been successful just from this preview screen.

    However:  If the new window/tab shows an error message like
Your theme could not be parsed as it is not well-formed. Please make sure that all XML elements are closed properly. <br/> XML error message: The element type "div" must be terminated by the matching end-tag "</div>".Error 500 
or
Your template could not be parsed as it is not well-formed. Please make sure that all XML elements are closed properly. <br/> XML error message: Element type "b:widget" must be followed by either attribute specifications, ">" or "/>".
 then Blogger has not been able to understand the change you made. Sometimes the error message gives a clue about what's wrong, although it can be misleading.   Check that you made the change correctly - fix any errors and click Preview again.  If it still doesn't work, ask for help from the place that suggested the change you are making 
.
  •  Once you are happy that the preview screen looks OK, click the Save theme button.


How to test your theme change

Some changes can be checked very easily, sometimes from the preview screen.

But if your change isn't visible on the front screen, you must check it after you have applied it. What to verify depends on your them type, what the change was, and what other features (eg the page-gadget as a menu, the archive widget, ) your blog uses. You need to decide what to test, based on all of these.

At least, I always click on and check on these things when I've made a major theme change:
  1. the home page
  2. the items in the menu bar
  3. a label value
  4. an archive widget entry
  5. custom-search-engine results
  6. comments

And if I'm being particularly reader-focussed, I'll also check these things in more than one browser:   usually in the current version of Internet Explorer, Firefox and Chrome.


What to do if your theme change wasn't successful

If you find that the theme change has caused problems, then ou have have a choice to make:
Can you and your readers live with the problems on your blog for "a while", while you look for other solutions? 
Or 
Do you need to remove the change right now, so visitors can use your blog as it was while you solve the issues.

There is no right answer to this question:   It's a personal decision, based on the blog, and your readers.   But if you do need to remove the theme change, here's how to do it:
  • Open the Themes tab
  • Click the Backup / Restore button near the top right of the dashboard
  • Click Choose File and find the file that you downloaded earlier
  • Click Upload.

It is best to restore your theme before you have changed any gadgets.  If you get a message about widgets being missing, then it means that the gadgets associated with your blog are not the ones referred to in the theme.   If this happens, you need to decide whether to deep or delete any "orphaned" ones, and may need to check their settings again.


Making complicated changes

If your theme may need a lot of "surgery" while you figure out how to make a change, then it may be a good idea to build a private test-blog to do the work in, and only copy the contents into your "real" blog theme when you are certain that you've got it correct (or correct-enough).


Related Articles

Advantages and disadvantes of editing your Blogger theme

Finding things while editing in your blogger theme

Adding CSS formatting rules to your blog, without editng the theme

How to remove the "powered by Blogger" attribution from designer-theme blogs

Putting a gadget on the homeppage only

Planning changes to your blog - without readers seeing what you are doing

How to find things in Blogger's Theme editor

This article explains how to find things (gadgets or text) in the Theme editor in Blogger.


Very often when you are editing your Theme in Blogger, you need to find particular text.

For example, you might need to find all places where  "</head" appears, so you can add something to the very next line.   Or you might want to find the code for a particular gadget (aka widget), so that you can put a conditional-formatting statement around it.

There are now two tools you can use to find items in the Theme editor:

  • The Jump to Widget tool if you are looking for a Widget
  • The Find bar if you are looking for a text string.

More information about using each of these is given below.


How to use the Jump to Widget tool

First, you need to find out the exact name for the widget / gadget that you need to find the code for.    (See Finding a gadget's name for a tip on how to do this).

Then, inside the Theme editor (see Editing your Blogger Theme for how to get there), just choose the name you are looking for from the drop down list .   (Click the arrow beside Jump to Widget to see the items in the list):


Once you have chosen an item from the list, the template editing window moves to the place where this gadget is listed in the theme code.   It usually places it in the 2nd line of the editing window.  For example, in the picture below, I chose to jump to the Followers1 gadget.


How to find any text in the Theme editor

Click anywhere inside the Theme-editor window:   this is the rectangle which shows the code in your Theme.    (It's important to click inside here first, or the next command will work differently)

On your keyboard, press Ctrl/f:   to do this, hold down the control (ctrl) key, and press the  f    key.

search bar will now show in the top right corner of the theme editing window - like this:

Type the text you want to find into the Search bar and press Enter.   

The cursor will move to the first time that the text appears.   

To find the next place where the text appears, click into the Search-bar and press Enter again 

Repeat as often as you need to find the correct place.  

When you are finished with searching, click the X button at the right hand side of the Search-bar to close it.


How to see the details inside a gadget or other piece of code

You can now find any text that you need to find in Blogger's theme editor (previously called the Template editor).   

But if you look carefully at the Theme-editing window you will see that there is sometimes a horizontal arrow in the left-hand side of the code, and that the line numbers jump - like this:


This happens because some of the detail is hidden, to make the theme-code easier to work with.

But you can use the arrow (called an expand-arrow) to see it all:  Click on it and you will see that it changed to a down arrow, and that the code window now shows some extra lines which were previously hidden.

You won't always need to do this:   some template edits just say to find the code for a gadget and to put extra instructions before and after it.   But others need you to open up the gadget code and make changes inside.


Job done!  You can now find gadget and text items inside your Blogger Theme - so you can continue editing it.


Related Articles

How to edit your Theme in Blogger

Applying conditional formatting to widgets

Finding the widget-id for a gadget in Blogger

Showing a PowerPoint file in your blog

This article is about options for showing the contents of a PowerPoint file inside your blog.


Previously I've described how to load content from MS Word to your blog.

But some people have material in PowerPoint (or other presentation software) files, that they want to show in their blog.   So far, I've identified three options for doing this.

These approaches should work on any PowerPoint formatted presentation, no matter what tool it was prepared with - except of course if it was Google Docs in which case you go straight to option 2.


Option 1: Each slide as an image

Follow these steps:
  • In PowerPoint, choose Save-as, and choose an image format (eg .png).   
  • When the system asks if you want all slides or just the current one, choose All.
  • Upload all the image files that were created to your blog - it's your choice whether you put them all in the same post, or one-per-post.
    I usually upload them firstly to Picasa web albums or another picture-hosting service, and then just link from my blog to there)

At first, I thought that this was a backward approach.  But recently I wrote an article based on a presentation that I gave several years ago.   After trying various ways of displaying the presentation and  the article, I realised that I was trying to find a way to include all the comments that I made when I used the presentation face-to-face.  To do this, I needed to show each slide individually, so I used this option because it gives full control over what commentary goes with each picture.


Option 2: Convert to a Google Docs Presentation

This is described in detail in  Using Google Docs's publish-and-embed option - I believe it's better than trying to use Google Web-elements, because it achieves much the same thing, and takes one piece (web-elements) out of the equation.


Option 3 Copy and Paste

As with MS Word, copy-and-paste from PowerPoint to Blogger is NOT recommended, because the PowerPoint content can have all sorts of extra HTML codes attached to it, and these can cause negative effects in your blog.

But you may want to copy-and-paste, either because you don't want the content as images, or because you want other things like presenter notes etc that are not stored in the presentation slides.

To do this, you need to:
  • Copy from PowerPoint, 
  • Paste into a text-editor (eg Notepad in Microsoft Windows)
  • Copy again from the text-editor
  • Paste into your blog.

An alternative may be to export the presentation as an outline (ie rich-text or RTF format), and then convert it via Google Docs in the same way that you would for a Word document.   You would need to test this to check if it brings in the items that are stored outside of the slides.


Option 4   Use a slideshow host

Another approach would be to set up on account on SlideShare or a similar service that allows you to upload slideshows and gives you code that you can add to your blog in the usual way, which embeds the slideshow in your blog.  

I haven't tried this one out myself, but in theory at least it should work.


Related Articles

Showing a PowerPoint presentation as a slideshow in your blog

Converting from MS Word to Blogger, via Google Docs

File hosting options - places to keep your files on-line

Tools for applying copyright protection to your blog

Putting embed code from an outside service into your blog
.

Trade with HotForex

Trading successfully will deifinately require to choose a broker that will give you quality service and low spreads, HotForex has been a broker that has proven to be the best with their high quality service giving their clients a service that probably not to find with any of these newbie brokers who claim to be the best.

We have proven and highly recommend HotForex as a broker that will generate results and low transaction costs as they have tight spreads as small as 0.1 on most major currency pairs.


Trading the Forex market has been the best way to make money online since the Forex market was discovered in the lae 20th century and people have been able to make millions and in the year 1992 a man by the name George Soros was able to make a profit of $1000 000 000 trading the Great Britain Pound in a single day which is probably the biggest profit to be made by a single individual.

The money made in the Forex markets is purely unlimited as the market has a daily turnover of up to 5.7 Trillion USD which is the amount of money that flow within this market in a single day. trading the forex market will require the investor a lot of practise and learning which HotForex provides to the clients for free as you are given an opportunity to open a free demo account with up to $100 000 USD practise money, to open an account with Hotforex kindly click on  the tab below

Hotforex Benefits

The best way to make money online is through Forex Trading and I strongly recommend most bloggers and entrepreneurs out there to get onto forex trading as that is where money is made, I mean real money. We make real money and we believe that once you join the winning team you will definately see the results, Join HotForex today for a free trading account.

How to not show any posts on your blog's home page, using Blogger

You can set your blog up so that no posts are shown on the main screen - provided you have used some of the other "home page" approaches to give readers other ways of getting to your content.


Previously I've explained how to only show one post on the main page of your blog.

But some people who want to give their blog a home page go further than that, and don't show any posts on the main screen at all.   (Remember, the main screen is where people who navigate to your blog, rather than to posts within it, go.)

This sounds like a strange thing to do - after all, blogs are about posts.

But actually it's fine, provided you use some other tools to let readers move around the blog.  I've made a 150+ page blog this way, and it works very nicely because I have organised the information and used some index-pages (containing lists of bus-routes, suburbs, maps etc) with tables that link to many other posts.


How to show no (ie zero, 0) posts on the main screen

Some people want to do this, as part of the process of giving their blog a home page.  It's not possible if your blog has a Dynamic thene, but can be done for blogs with Layout themes.

There are at least two ways of doing it.

Option 1 - use a custom re-direct for your home-page

Make a new Page (Pages > New Page) and add the material which you want to show on your main screen.    Publish this page.

Take a note of the URL of the Page that you use created.

Go to Settings > Search preferences > Errors and re-directions . Custom re-directs

Click Edit then New re-direct

In the dialog box which opens:

  • Enter a back-slash (ie   /  )into the first (From) box.
  • Enter the URL of the page that you noted earlier into the second (To) box
  • In the To box, remove the blog-address, because Blogger already adds that for you.
    Eg if your URL is     http:/www.myBlog.com/p/home.html
    then just enter           /p/home.html

    (note that you keep the backslash (/) just before the P.
Click the Permanent checkbox.

Click Save just under the entry you just made - it now looks like this:


Click Save changes.


Job Done!   Anyone who goes to your blog's home page will now go automatically to the alternative page you made - and the effect is that no posts are shown on the home page.


Option 2 - use the Posts and Comments setting

Choose the Settings > Posts and Comments panel from the left sidebar.

Enter zero (0) into the Show at most field
Click Save Settings in the top right hand corner of the screen.


    About this method

    The method in Option 2 works:   no posts are shown on your home page.

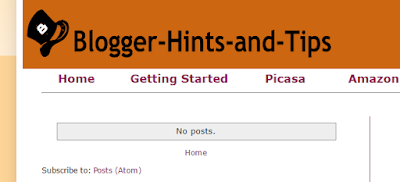
    But by default, nothting else is shown, either.    Unless you take steps to avoid it, your readers will see a grey box saying "0 Posts" when they look at your blog's main URL.   


    Some of the things you can do to avoid this include hiding the "showing posts with label XXX" message, and creating a gadget that only shows on the "home" page.


    Recommended option

    The custom re-direct option is probably the best approach - and is certainly what I've used for my blogs recently:   it's clean, and doesn't need any special messing around with gadgets etc to put content onto the "home" page.

    But there may be cases where the second option is better - and I have recently confirmed that it still works.


    Related Articles

    Limiting your blog to only have one post on the main page

    Giving your blog a home page

    What are dynamic view themes?

    Blogger theme types
    .
    Using tables in your blog

    Displaying a gadget only on the home page

    How to get a valid URL for a picture in Google Photos

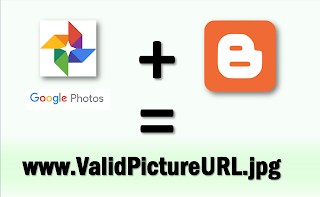
    This article explains the problems with getting valid, SEO-friendly links to images that are in Google Photos - and shows a way of doing this using Google products.  


    Previously I've explained how to get a URL for a picture stored in Google Photos - and the difference between Photo's "shareable links" and real photo URLs.

    The sort of link you get with this procedure looks like this:
    https://blogger.googleusercontent.com/img/b/R29vZ2xl/AVvXsEicBjWubDi8QRpBFQMwz_faua-kdrtXUga4x4NCQoWMD7OY1kYEG8IwpN3M-N7_EAku3ihH_h6OGeuiCwr1pPH9eZMC161W40Tp73c8Z_Bm0exgtkyzFVzrXfH_apWVU1Hc0qObZNgg6dVN/w1006-h566-no/

    There are some issues with using URLs (aka web-addresses) obtained like this:
    • They aren't recognised as valid image file links by many online tools which ask for the URL for an image (eg phpBB, Blogger - and many others)
    • Sometimes they stop working
      (I've not been able to track down exactly when, but there are reports around the internet from people who say that links like this work for a while and then stop).
    • They don't include the SEO-targeted keywords which you carefully used to name the photograph file before uploading it to Google Photos.  
      (Not everyone does this, and it's a lot harder for photos that were taken on your phone.   But some people do it, and to them not having the keywords in the photo URL is a big deal.)

    Luckily, there is a way around these problems, which gives you a web-address for a picture stored in Google Photos that ends with the same file extension which you uploaded to Photos  (eg .jpg, .png  .bmp), and which includes the keywords which you used in the file name.


    How to get a valid URL / web-address for a picture in Google Photos, using Blogger


    1    If you haven't done so already, then upload the photo to Google Photos, in whatever way you usually would  (if you have your smartphone synched with your Google account, you may not even notice uploading it).

    2    In Google Photos, find the photo and put it into an album.  
    (It doesn't matter which album you use - and  you can delete the album again later, you just need the photo to be in an album for now, and you need to remember which album this is).

    3    Using a desktop or laptop computer (ie not your phone), go to Blogger
    • If you've never used Blogger before, you may be asked to accept the terms and conditions.   Just say "yes" to this   (you are't actually going to use Blogger to publish anything).
    • If you don't already have a blog, the click the Create a blog link, and follow the steps to create one.
      (You won't be publishing this blog, so it doesn't really matter what name you give it or what template you use - just pick anything that's available.   )
    • Or if you do have one or more blogs, just pick one (any one is OK: you're not actually going to publish to it) and go into the Blogger Dashboard.

    4    Click New Post
    This opens up the post editor.  

    5   In the tool-bar at the top of the post editor window, click the Insert image icon.


    It's the rectangle that looks like a picture


    6   Choose the From the Google Album Archive tab.
    (Google have changed the name for this a couple of times since they introduced the feature - right now it says exactly what I've listed here - the name may vary, but you get the idea:   choose your Google Albums).

    7   Navigate to the album that you put the picture into, in step two.   Open it, and find the picture, and select it.

    8    Choose Ok.  

    9     Wait a moment while the image is placed into your blog-post, and automatically resized.   

    10    Click on the Edit HTML tab (currently at the top left side of the post-editor) to go into Edit HTML mode.     You will see HTML code like this.
    <div class="separator" style="clear: both; text-align: center;">
    <a href="https://blogger.googleusercontent.com/img/b/R29vZ2xl/AVvXsEh0qBL3bXRzV_5-2shyPXkaFRAMDURwm2P7cLCzZuiZ74n_SeZ7c_I3ZKa0OoidYW4FqlD40V0TkI5tA9oxO-dfQu-N9NyKcnLRH1RacFgqkzHbN-Y6qGDl6jOs_Q-peiOxNRzVI2M9CnQ/s1600/tarmacadam-promenade-sunny-september-day.PNG" imageanchor="1" style="margin-left: 1em; margin-right: 1em;"><img border="0" height="180" src="https://blogger.googleusercontent.com/img/b/R29vZ2xl/AVvXsEh0qBL3bXRzV_5-2shyPXkaFRAMDURwm2P7cLCzZuiZ74n_SeZ7c_I3ZKa0OoidYW4FqlD40V0TkI5tA9oxO-dfQu-N9NyKcnLRH1RacFgqkzHbN-Y6qGDl6jOs_Q-peiOxNRzVI2M9CnQ/s320/tarmacadam-promenade-sunny-september-day.PNG" width="320" /></a></div>

    Or like this, if you didn't give the image a better filename before uploading it:
    <div class="separator" style="clear: both; text-align: center;">
    <a href="https://blogger.googleusercontent.com/img/b/R29vZ2xl/AVvXsEjeO0PMVmDc6bRt6mBZNLckM3SrO1Asyn5MlgjUVjrAi4HTsM6TuYeWa_Gv60vArBWNHgk2VFd1Q4Ter7jRVW6lSU183_Ygeb6JAb3emhJv5YowBK7vaPegZgs7x5YdN61jWWR-HxialGw/s1600/DSC_3573.JPG" imageanchor="1" style="margin-left: 1em; margin-right: 1em;"><img border="0" height="180" src="https://blogger.googleusercontent.com/img/b/R29vZ2xl/AVvXsEjeO0PMVmDc6bRt6mBZNLckM3SrO1Asyn5MlgjUVjrAi4HTsM6TuYeWa_Gv60vArBWNHgk2VFd1Q4Ter7jRVW6lSU183_Ygeb6JAb3emhJv5YowBK7vaPegZgs7x5YdN61jWWR-HxialGw/s320/disc0137.JPG" width="320" /></a></div>

    11   Find the part which starts   src="     and ends with a closing quote-mark.      This is the URL for the picture you chose.   In the example above, it's the part in bold-red

    12    Select and copy the text between the two quote marks after src=    ie   the equivalent to the piece of code shown in red.


    Job done!     A general-purpose, valid, well-formed, web-address for the picture you want is now in your computer's memory, and can be pasted into anyplace where you want to use it.

    To get out of Blogger, click Close (near the top right of the screen), and agree to leave the page anyway even though it means you will lose your work.


    Troubleshooting / Extra for experts

    Finding the image code in your post

    If there is other material in the post that you are using, then you may want to put some marker text before and after the photo while you are still in Compose mode, to make it easier to find the right  part when you are in Edit HTML mode.


    Getting a valid link to someone else's photo

    You may want to find a valid URL for a photo that someone else has shared with you - but of course you cannot add this to one of your own albums.   In this case, the solution is to download a copy of the photo which was shared, then upload it to your own Google Photos.


    Using the blog you've made for other things

    Maybe using Blogger like this has given you ideas about other things you can use it for:   that's great, Blogger is an excellent tool for publishing material on the internet with a minimum of fuss - while also having enough features to let you do some sophisitcated things.   And even just the post editor can be a handy HTML generator at times.   You might like to read Getting Started with Blogger, for some tips about how to set up your Google account and very first blog.


    Other challenges?

    Do you have any questions around this approach, and how to solve problems with it?   Please a message in the Comments box at the bottom of the page, and I'll see if I can find a solution.


    Related Articles

    How to get an URL for a picture stored in Google Photos - version 1

    Using marker text to find things in your post's HTML code

    Things to consider before starting to use Blogger

    Using Blogger's post-editor as an HTML generator