Showing posts with label Blog structures. Show all posts

How to not show any posts on your blog's home page, using Blogger

You can set your blog up so that no posts are shown on the main screen - provided you have used some of the other "home page" approaches to give readers other ways of getting to your content.


Previously I've explained how to only show one post on the main page of your blog.

But some people who want to give their blog a home page go further than that, and don't show any posts on the main screen at all.   (Remember, the main screen is where people who navigate to your blog, rather than to posts within it, go.)

This sounds like a strange thing to do - after all, blogs are about posts.

But actually it's fine, provided you use some other tools to let readers move around the blog.  I've made a 150+ page blog this way, and it works very nicely because I have organised the information and used some index-pages (containing lists of bus-routes, suburbs, maps etc) with tables that link to many other posts.


How to show no (ie zero, 0) posts on the main screen

Some people want to do this, as part of the process of giving their blog a home page.  It's not possible if your blog has a Dynamic thene, but can be done for blogs with Layout themes.

There are at least two ways of doing it.

Option 1 - use a custom re-direct for your home-page

Make a new Page (Pages > New Page) and add the material which you want to show on your main screen.    Publish this page.

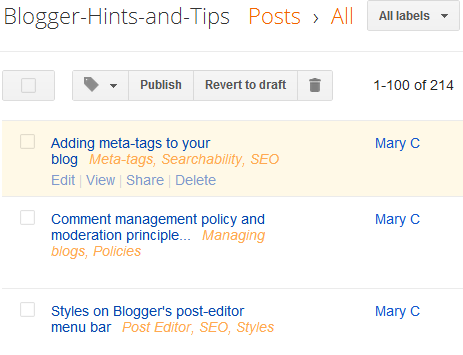
Take a note of the URL of the Page that you use created.

Go to Settings > Search preferences > Errors and re-directions . Custom re-directs

Click Edit then New re-direct

In the dialog box which opens:

  • Enter a back-slash (ie   /  )into the first (From) box.
  • Enter the URL of the page that you noted earlier into the second (To) box
  • In the To box, remove the blog-address, because Blogger already adds that for you.
    Eg if your URL is     http:/www.myBlog.com/p/home.html
    then just enter           /p/home.html

    (note that you keep the backslash (/) just before the P.
Click the Permanent checkbox.

Click Save just under the entry you just made - it now looks like this:


Click Save changes.


Job Done!   Anyone who goes to your blog's home page will now go automatically to the alternative page you made - and the effect is that no posts are shown on the home page.


Option 2 - use the Posts and Comments setting

Choose the Settings > Posts and Comments panel from the left sidebar.

Enter zero (0) into the Show at most field
Click Save Settings in the top right hand corner of the screen.


    About this method

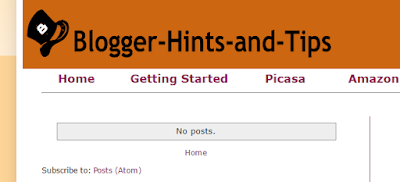
    The method in Option 2 works:   no posts are shown on your home page.

    But by default, nothting else is shown, either.    Unless you take steps to avoid it, your readers will see a grey box saying "0 Posts" when they look at your blog's main URL.   


    Some of the things you can do to avoid this include hiding the "showing posts with label XXX" message, and creating a gadget that only shows on the "home" page.


    Recommended option

    The custom re-direct option is probably the best approach - and is certainly what I've used for my blogs recently:   it's clean, and doesn't need any special messing around with gadgets etc to put content onto the "home" page.

    But there may be cases where the second option is better - and I have recently confirmed that it still works.


    Related Articles

    Limiting your blog to only have one post on the main page

    Giving your blog a home page

    What are dynamic view themes?

    Blogger theme types
    .
    Using tables in your blog

    Displaying a gadget only on the home page

    Putting files into Blogger's root directory

    This article explains the issues, and options, for putting a file into the "root directory" of your Blogger blog.


    Turnips (Brassica rapa) 
    from Wikimedia commons
    Originally posted to Flickr 
    by thebittenword.com.  
    Licensed under the terms of 
    the cc-by-2.0.
    If you are using certain non-Google products to enhance your Blog, they will sometimes tell you to put a file into your root-directory.   They may even tell you to use an FTP  tool to do this.

    Sometimes this happens when a product also gives you code to install into your blog , This approach is used when the code is written for websites in general rather than specifically to work with Blogger: putting useful files into a place relative to the root directory makes it a lot easier to move a website from a test-address to the live one, so is a common approach outside of Blogger.
    Or maybe the other tool has been designed to verify that you do own the website in this way, rather than asking you to change the website code itself.


    How to add a file to your blog's root directory

    The short answer for Blogger users is "sorry, you cannot do this".

     The long answer is still no:  "there is no way to do this, but see the rest of this article for an explanation of why, and some suggested work-arounds."


    Why not? Every other website tool lets me do this.

    Home - cpg1.5.x demo 1287551599033
    Posts:  Blogger's tool for managing
    the content on our blogs
    If you're clever, and have lots of time, you can make a website just using a text-editor like notpad, a graphics programme, and ftp software that lets you put the files into the right places on computer that's connected to the internet.

    Tools like Dreamweaver take away a lot of the time-consuming work, and some of the need for cleverness.  But you still need to know a lot about the internet to do things in a way that makes a good website.

    Content management systems make this easier still: they let a technically-minded person do the nuts-and-bolts work to make the website, and give authors / artists / editors / content-creators simpler-to-use tools that let them put "stuff" (ie content) into the website, without needing to worry about the details of how it works.

    Blogger is a (very simple) website content-management system, it creates our web-pages for us based on data that we put into certain places. Administrators can set up and change templates, other people, eg authors simply make posts.

    When we use Blogger, the main way that we change the data in our web-pages is using the Blogger software. 

    Some items inside posts or gadgets can be changed using other software, eg Google Docs, provided they were were set up using that other software in the first place. But - key point - there is nothing in the way that Blogger is put together that means we need to access the base directory. So they don't let us do so.    And I doubt that this this will change anytime soon.


    What to do instead

    The options for getting around this restriction depend on how the file that you need to put into your root directory is intended to be used.


    Installing code

    If you have code to install into your blog, and a file to go with it, then you just need to
    1. Host the file somewhere else (maybe in your Picasa-web-album for the blog, if it's a picture)
    2. Change the code to point to the full path of where you have hosted the file, instead of the relative path used in the code
    For example, here is the code for a button linking to my blog, with the picture in the root directory:
    <div class="separator" style="clear: both; text-align: center;"> <a href="http://www.areyoublogger.blogspot.com" imageanchor="1" style="margin-left: 1em; margin-right: 1em;"> <img border="0" src="//Logo.png" width="100" /></a></div>
    To change this to use a specific location, I just add a file-path and the file-name of the picture wherever it is hosted.
    <div class="separator" style="clear: both; text-align: center;"> <a href="http://www.areyoublogger.blogspot.com" imageanchor="1" style="margin-left: 1em; margin-right: 1em;"> <img border="0" src="https://blogger.googleusercontent.com/img/b/R29vZ2xl/AVvXsEh86rlBmDlB-Z4rZ3eWjsFzrfLPhtqSTJUBFplqXP-MFlM0_xYiunzCUGyaoqUmAiLqEEXnZ2NX6oxlcoa__9_Qw-bWci3qbQpjGlLzZB_pKxzd2km8ev_0DFjgS8FebcjzejwwmxxPUy2v/s320/Logo.png" width="100" /></a></div>

    TIP: blogger's editor sometimes gets links mixed up, so it's important to start the filepath with "http://"


    Verifying ownership

    If someone wants to use a file's position to check that you control a website, then they will have code on their own website that looks for the file in your root directory.

    You cannot change this code. And you cannot place the fie.

    So you need to ask them for an alternative way to verify, that is suitable for people without root directory access.

     If they don't have any alternatives, try lobbying for this on their product support forum:  by not having alterantives, they are ensuring that Blogger users, among others, cannot use their service.

    If the official answer is still "no", then you could also ask in other on-line forums if anyone has found any other work-arounds.


    What other reasons have you found for installing files to your root directory?   
    What work-arounds have worked for you?


    An afterthought: what isn't recommended

    Transclusion-iconI've recently seen someone suggest in a help forum that people with custom domains can put files into their blog's root directory by FTP'ing the files into place.

     This may be true, if the service that you are purchasing from your domain registrar includes file-hosting. But file hosting(*)
    1. Isn't necessary for a custom domain used in Blogger (since Google hosts our files for us), and
    2. Isn't available as part of the services when you buy a custom-domain through Blogger.

    So it's not a general solution for most Blogger users, though it may work for some.

    Initially I was a little sceptical of the idea: Blogger doesn't expect to see any files in our root directory, so I was concerned that it might do strange things if it found them there. But on reflection, I think there is probably a low risk of this happening, since the file-location is outside Blogger's control.

    (*) To avoid any confusion, file hosting and DNS hosting are not the same thing. If you buy a custom domain for your blog from a registrar without going through Google/Blogger, then you do need to pay for DNS hosting, but do not need to buy file-hosting.


    Related Articles

    File hosts - places to store files used in your blog.

    Picasa-web-albums: a quick introduction

    How Blogger data is organised

    Setting up a new administrator for your blog

    Options for letting other people write in your blog

    How to change or remove the Newer Post and Older Posts links

    This article explains how to hide or change the format of the "Older Posts" and "Newer Post" and "Home" links that are shown at the bottom of Blogger blogs with Layout or Designer templates.


    Why are the older and newer posts links used

    Most designer and layout templates have links at the bottom of your page of blog posts which let readers navigate back and forward among the list of posts.

    This is basic to how a blog is intended to work:  you post regularly, and give people a way to get back to previous posts.

    The pager-links are particularly important on pages that are reached using the Label or Archive gadgets, which may show more posts than you normally have on your home page, or displaying in your blog.

    But some people want to remove them - and this is fine provided readers have other ways of navigating around the blog.


    How to remove "Newer Posts" and "Older Posts" from your blog

    To totally remove these items, you just add some new CSS rules to your template in the usual way.

    To remove "Older Posts" add:
    #blog-pager-older-link {
    float: right;
    }

    To remove "Newer Posts" add:
    #blog-pager-older-link {
    float: right;
    }

    Or to remove both of them and the "Home" link that appears in between them, add:
    #blog-pager {
    display: none;
    }

    How to format the "Newer Posts" and "Older Posts"

    Changing the way that these links look is very similar, you just add the same codes, except instead of 
    display: none;
    you need to use the CSS element for the effect you want.   For example, to make the text bigger and bold, you might use rules like
    font-size: 150%;
    font-weight: bold;

    You need to put these commands inside the curly brackets, where the display: none; is now - make sure that each component has a semi-colon at the end of it.   It makes the code easier to read if each component is on a new line, but this isn't necessary.

    Another option is to swap the "float" commands around to put "older posts" on the left and "newer posts" on the right (I've never quite understood why they were the other way around).


    You can also use background images and colours, with elements like:
    background-image:url('URL OF YOUR IMAGE');
    background-color:#cccccc;

    How to change the "Newer Posts" and "Older Posts" text


    If you want to change the text values - either to different words, or by replacing them totally with pictures, you need to accept the disadvantages of editing your template.   If this is ok, and you you want to proceed then:

    1  Edit your template in the usual way

    2  Replace the existing links:
    • To replace the "newer posts" link, find <data:newerPageTitle/>  in your template, and replace it with whatever text you want.
    • To replace the "older posts" link, find <data:olderPageTitle/>  in your template, and replace it with whatever text you want.  
    • To replace the "home" link, find <data:homeMsg/>  in your template, and replace it with whatever text you want.   


    In each case, the code you are replacing will be inside some other code, like this:
      <span id='blog-pager-newer-link'>
          <a class='blog-pager-newer-link' expr:href='data:newerPageUrl' expr:id='data:widget.instanceId + &quot;_blog-pager-newer-link&quot;' expr:title='data:newerPageTitle'><data:newerPageTitle/></a>
          </span>
    Make sure that you only replace exactly the code listed above, including the < and >'s.   The other code around sets up the links to the actual older or newer posts, and you don't want to change this.

    Also, if you want to use a picture instead, replace it with <img alt='...' border='0' src='THE URL OF YOUR PICTURE'/> - of course with the right picture URL put in.

    Do make sure that the meaning of your pictures is obvious though - what may look like a cute "newer posts" symbol to you might be totally meaningless to someone else.


    Related Articles

    How to add a CSS rule to your template

    How to edit your blogger template

    Understand the advantages and disadvantages of template editing

    Finding the URL of a picture in Picasa-web-albums

    Understanding designer and layout templates

    Giving your Blog a Home Page

    This article is about the options for setting the home page for blogs made with Google's Blogger.


    Blogs don't have a "home page", main page or "landing page" in the same way that regular web-sites do.  Instead, they show the newest post first, since (hopefully!) most readers will be return visitors, coming back to see what's new.

    But there may be blogs/websites where you want a welcome message or a particular post to appear first whenever someone visits your blog, or where you want to put all your posts in reverse order.

    This article is about options for giving your Blogger blog a "home page".

    It lists four options, and gives advantages/disadvantages of each approach, and links to articles with details about implementing each case. If you can think of any more approaches, please leave a comment below.


    Options for giving your blog a home page include:

    • Static page combined with a custom re-direct - as discovered by Nitecruzr, and now described here.  This was my recommended method of home-page implementation for a while.   However it did not work on mobile themes for a while, so I changed my mind.  But it does work on them now, so I'm back to recommending it again.


    Advantages and Disadvantages of each option


    Option Advantages Disadvantages
    Static page and custom re-direct No theme editing is needed

    Easy page editing - no messing around putting content into a gadget

    No gaps on other pages due to the gadget being "missing"

    Simple, elegant, and fully functional for both desktop and mobile visitors.
    Back in 2011, I wrote:  
    "Google probably didn't intend to give us this option when they set up custom re-directs, so it's possible that they might remove it again.   It's such a nice solution, though, that I think it's worth the risk for now".
    But it's now 2017, they haven't removed it yet.   So I'm thinking that it's not going away any time soon.
    Show all posts in reverse order Great for new readers - they can "follow the story". Return visitors have to navigate down to where they were up to last time:  the blog has no way of helping them to remember where that was.

    You can't use most of Blogger's date features:  newer and older posts links will take the reader in the "wrong" direction.  And you have to manually enter any dates that would be relevant.

    Your posts will get "older" as you write more:  this may confuse search-engines, and there's a risk that google might to things to "very old" posts in the future.
    Make one post always show up first You can still use all of Google's date features.

    Readers will know when you actually posted to your blog.

    Great for returning readers:  they can see your (current) welcome comments, and then go straight to the latest post after that.
    You have to remember to edit the "chosen" post every single time that you make a new post - one day, you might forget.

    This approach probably won't work on multi-author blogs:  there's a very high chance that someone would forget to edit the chosen post and change its date.
    Show a "welcome gadget" on the home page only Doesn't need any changes to Post date-time settings.

    Your blog still functions like a blog (older/newer post links , archive gadget etc).

    An HTML/Javascript gadget can be very flexible, and you can get Blogger to write all the HTML for you - see Making a Gadget Like a Post.

    You can use things other than text, eg a picture or even a poll.

    It includes an extreme option:  you could show no posts on the "home" page, and just show the gadget.
    You need to edit your theme to make this work.

    You need to re-do the theme customisation every time that you change to use a different theme.

    The welcome gadget isn't one of your posts: it's not included in exports of your blog contents (It is in an export of your theme - but the words inside it are not included).

    A gadget cannot show quite as many things as a post.  

    Doesn't work for mobile device users if your blog has a mobile theme enabled, unless you some some specific things to make the gadget show on mobile.


    Can you think of other ways?   Please leave a comment below.


    Setting the homepage's post date into the future doesn't work

    Some people suggest that you can set the post-date of your main page in the future - and at some times  this has worked.

    But now that scheduled posting is working the way most people expect it to (ie if you write a post today, and publish it with tomorrow's date, then it is shown to your readers from tomorrow onwards), this will not work - because your "home page" won't show until that future date is reached.

    There may be some ways you can fudge it in to working (eg post the page with a date in the past, and then post it again with a future date).   But I VERY STRONGLY don't recommend this:  even if they work today, they may stop working at some time in the future when Google make a change to how future-dated posts are handled.


    Related Articles

    Displaying a gadget only on the home page

    Showing your oldest post first in Blogger (AKA Showing your posts in reverse order)

    Making one post always come up first

    Changing the date for a post.

    Stopping certain pages from ever appearing on the home page

    How to put put Posts into Pages in Blogger

    This article shows how to set up your blog, using Blogger, so that it looks like your posts are on separate web-pages.


    Can you put Posts onto Pages in Blogger?

    Ever since Google introduced "pages" into Blogger, people have complained that their posts all go onto the "home page", and asked how to put posts onto different pages in their blog.


    The standard, but unsatisfactory, answer is
    "Sorry, that's not how Blogger works.   So called "static" pages in Blogger are meant to be used for reference information that doesn't change often, which you don't want to be part of your regular post-feed, but which you do want users to have easy access to."

    Basically, this is part of the difference between post and pages.

    Luckily it's easy to set up your blog so that it looks like your posts are on different pages [tweet this]    (even though you and I know that this isn't how Blogger works) by following three simple steps.


    Follow these steps to put your posts into pages

    1   Add Categories

    Categorise your posts by adding Labels to them.

    It's your choice whether to add Labels to all posts, or just the ones that you want to show up on specific "pages".


    2 Make a "pages look alike" menu bar

    There are (at least) are three ways of doing this - described below.

    When Blogger first implemented static pages that could link to websites, I suggested choosing which ever option suited your blog best.  

    However now, due to the increasing importance of mobile themes, I recommend Option c), because the pages-gadget is the only one mentioned that automatically shows upon mobile-themes.

    a)   With a Labels Gadget    

    Use the usual add-a-gadget approach to put a Labels gadget into the spot where you would put the Pages gadget if you wanted to make a horizontal menu bar with it.

    If your blog has some Labels that you don't want to have "pages" for, then set it to show only some of your Labels:

    b)  With a Linked-list gadget

    Use the usual add-a-gadget approach to put a Link-list gadget where you would put the Pages gadget if you wanted to make a horizontal menu bar with it.
    Add a link to the list for each Label that you want a "page" for.   The HTML to use for each Label value is

    http://YOUR-BLOG-URL/search/label/THE-LABEL-NAME

    You can also add other items (eg individual Posts, or even Bllogger's static "pages" if you really must have them - see why I don't like them!) - see the menu bar at the top of this site for an example of this. 

    c)   With a Pages gadget   <===   RECOMMENDED APPROACH

    Use the usual add-a-gadget approach to put a Pages gadget into the menu bar area.   (You can do this even if you have not created any Pages of content).

    While you are editing the Pages gadget, there is an  + Add external link option.  

    Click on this, and add an entry in like the ones described above in he Linked-list gadget option, putting
    •  the text you want in your menu bar into the Page title field 
    • The label search command into the Web address field.


    3   Optional:  Deal with the home-page

    If you don't want your posts to appear on the "home page" was well as the topic pages, then there are two possibilities:

    OR

    • Give your blog a "home page" using the custom-redirect option discussed in this post.

    However I generally see this as unnecessary, because in most cases, very blog visitors ever see the home page.


    Job Done

    It really is that simple.  Your readers can now click on the "pages" in your blog from a "menu" at the top, and see a list of posts for the Page that they chose.

    Even better, if some posts relate to more than one topic, they show up on both of the relevant pages.    And if you have used the Pages gadget, your blog is well set-up to work with a mobile-theme - which is something that is getting more important every month.

    Don't forget to test your blog, to make sure that the menu bar is working how you expect it to and that it looks OK, in all the browsers that your readers are actually using.


    Related Articles

    Using Labels to group your Blogger Posts

    Adding external and internal URLs to your pages-gadget / menu bar

    Giving your blog a home page

    The difference between posts and pages

    Showing a Gadget only on the Home Page

    Making your blog work for people using smartphones and tablets

    How to make a blog into a real website

    This article explains how you can use Blogger to make a site that looks just like any other website and why you might, sometimes, want to do this.


    Blogs vs Websites

    Some people are very happy to use Blogger to make a blog, that is, website that looks like a diary or journal that they write in regularly.

    But others aren't.   So a common question is "how to I make my blog into a real website, just like "someone" has done over at "this website"?

    This isn't easy to answer:  Not everyone means the same thing when they say "real website".  "Someone" might have just changed the background image, installed a third-party theme, changed a few settings - or re-written the entire Blogger theme file!  They may have just made the blog look more professional than the basic themes do - or maybe they've removing all "blog" features so that the site is like a regular brochure website.

    The bottom-line is that, even with no changes a blog is a "real website", because it's got:
    • An url (www.your-blog-name.blogspot.com)
    • A space on the internet that's dedicated just to it. (For Blogger users, that space is inside Google's servers - we don't have to pay for our own hosting).
    • Web-pages, made in HTML, which visitors can look at using a web-browser (eg Internet Explorer, Firefox, Chrome, Safari, etc)

    And there are some sites which are not at all ashamed to look like blogs, for example:

    This article from Blogger Buster lists a 100 others - and I'm sure that there are plenty of popular non-English language sites that look like blogs, too.

    But there are many other sites that have had some or all of their Blogger features hidden, for example

    You need to do more work to make the second type of site - and even then, if a knowledgeable visitor looks at the source-code for a page, they can still tell that you're using Blogger.   So, usually, I'd recommend that you focus on what you want to achieve with the site, rather than "getting rid of blogger".

    That said, here is a lit of things that you may want to to do to "turn your blog into a website".   They are in, roughly, the order that I recommend doing them to have the maximum effect.


    Initial steps to reduce the "bloggy" feeling


    1)   Get a custom domain

    This is a website address like  www.mySite.com  or  www.yourBlog.org - or whatever available name that you choose.

    Using a custom domain means that your address will not have "blogspot.com" in it.

    You can do this either:

    This step is essential if you don't want the site to be perceived as blog, because the address is what people see when they first find the site in search-engine results.

    If you are going to get a custom-domain, then I strongly recommend doing it at the very beginning of setting up your blog, so all the later steps are based on the custom-domain name rather than re-directions.  This is is A Good Thing for SEO - and even if SEO doesn't matter for your blog initially it may become important later on.


    2)    Turn off the navBar, and remove the space where it used to be


    3)   Show only 1 post on the main page.


    4)   Hide the "blog-specific" values from posts, on the Layout > Blog post (edit) tab.  

    At a minimum the things to turn off are:
    • Post-date
    • Posted-by
    • Post-time
    • Comments
    • Links to this post
    • Labels
    • Reactions
    • Email post links
    • Post sharing

    5)    Make a home page - ideally using the custom-redirect option


    6)    Remove the attribution gadget (the bit where it says "Powered by Blogger")


    7)    Remove the "subscribe to posts (atom)" link


    8)    Add an RSS-subscription gadget using Feedburner.
    Some people say this is optional - but I believe that all "proper" websites offer an RSS feed and show that they do so by using a feedburner-style RSS chiclet.   If you just add Blogger's Subscribe gadget instead, it gives the Atom - ie blog-style feed.


    Banishing the Blogger look for good

    These next steps really go together: if you do one, you need to do the others too. They are needed if you totally want to remove the blog-ish-ness:


    9)     Remove all gadgets that show a list of posts. These include the Archive, Labels.  This is simply the reverse of the add-a-gadget procedure - edit the existing gadget, and click Remove.


    10)   Remove the "older posts / home / newer posts" links.


    11)   Set up your own navigation system: every post or page needs to be able to be accessed from either a button or a link that is in either a gadget or another post/page.

    It's temping to think about navigation from the home page. But first-time visitors who come to your site from search-results will not arrive at the home page. They might not even think to look at the home page. Ideally your navigation system should offer several routes to get to every piece of information, and should include both logical links between posts and a search-based option.

    Tools that you might use to help with this:
    • Summary posts, with links to detail pages about the topic. (Eg my public-transport site has a "city buses details" page, which links to individual route maps)
    • A menu bar with links to the most-important summary posts.
      NB  If you use the Pages gadget for this, it is automatically included if you give the site a mobile theme which is an important step if you want the site to be responsive.
    • Linked-List gadgets to show summary posts, or lists of related detail posts, in the sidebar or footer.

    An alternative to your own navigation system is to use categories to put your posts into pages. This doesn't fully reduce the bloggy feeling, since someone who looks at a page sees a list of posts (with just post-summaries if you've used jump-links).   However changing the the status message (the grey box that says "showing all posts with label whatever") can make this acceptable in some sites (ie ones where the line between blog and website is blurred).


    What you (currently) cannot do

    You cannot remove the post-date values from the URL of blog posts.
    If your entire site could be done with 20 or fewer screens, you could use Pages for everything - but IMHO this isn't necessary, visitors don't seem to be overly spooked by URLs with numbers in them.

    You cannot use a dynamic theme 
    If you want your site to look like a website, not a blog: you need to use a Designer, or possibly a Layout, theme.


    Other things that you might do

    You might want your blog tostand out in the seach results in order to get more visitors - see Getting Started with SEO.

    You might want to link it to the social networks - remember that there are wide range of possible links, and you need a strategy about how the site relates to each social medium that you use.


    Have I missed anything?

    I wrote this article  while I was setting up a site on which I want to minimise the "blog" look-and-feel, and I've tried to capture all the steps that I did.  

    But maybe I've missed some things?   Maybe there are features that work differently on other themes.

    What else would you do?